Imagine the look on a child's face, or even your own, when a beloved character's dress materializes not from a store shelf, but from your own hands. That's the magic behind delving into DIY Tiana Dress Tutorials & Patterns. Princess Tiana, with her indomitable spirit and iconic bayou style, offers a fantastic canvas for creative sewing. Forget flimsy, uncomfortable store-bought costumes; with a little fabric and determination, you can craft a beautiful, durable, and genuinely comfortable garment worthy of a princess – or a casual day at the park!
At a Glance: Your DIY Tiana Dress Journey
- Why DIY? Create a more comfortable, durable, and unique Tiana dress than anything you'd buy in a store, often saving money in the process.
- Understanding the Tiana Look: Pinpoint the key elements – the signature green, lily pad motifs, layered skirt, and elegant silhouette.
- Finding Your Perfect Pattern: Discover beginner-friendly patterns like the "Tiana Dress" from Made for Mermaids, which offers detailed, step-by-step instructions.
- Essential Supplies: Learn about fabric choices, notions, and basic sewing tools you'll need.
- Beyond the Basics: Add magical embellishments like flowers and lily pads to truly capture the essence of Tiana.
- Care & Longevity: Tips for making your handmade dress last through countless adventures.
Why Craft Your Own Tiana Gown? Comfort, Durability, and Pure Magic
The allure of a princess dress is undeniable, but the reality of many store-bought costumes can be...less than enchanting. They're often itchy, poorly constructed, and quickly fall apart after a few enthusiastic play sessions. This is where the world of DIY truly shines.
When you choose to explore DIY Tiana Dress Tutorials & Patterns, you're not just making a dress; you're investing in comfort, durability, and a truly unique piece. Imagine a little one wearing their favorite princess gown all day, not just for a party, because it's made from soft, breathable fabrics. Or perhaps you're creating a stunning, high-quality cosplay piece for yourself that stands up to conventions and photoshoots. Handmade garments allow you to select premium materials, ensure a perfect fit, and build something designed to last. Plus, there's an immense sense of pride that comes with creating something beautiful with your own hands.
Decoding Tiana's Enchanting Style: Key Elements to Look For
Princess Tiana's signature gown from The Princess and the Frog is a masterclass in elegant, nature-inspired design. To truly capture her essence in your DIY project, focus on these defining characteristics:
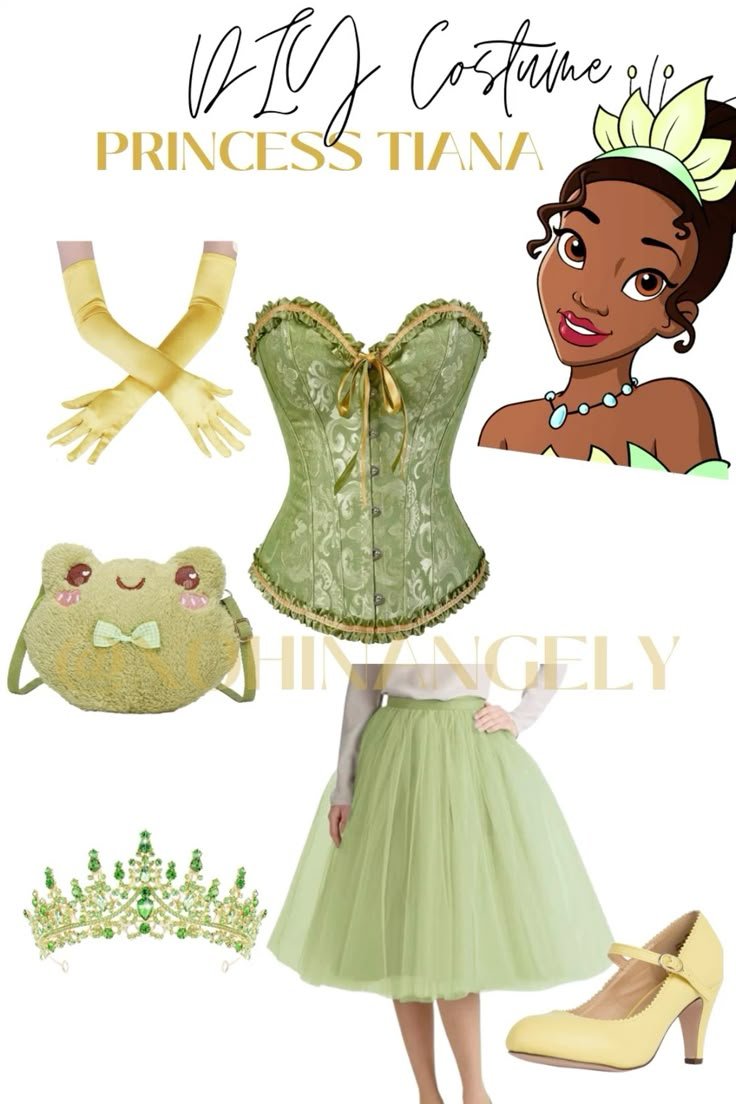
- The Signature Green: Tiana's iconic dress is a vibrant shade of green, often with subtle variations or accents in lighter green, yellow, or white. This color palette immediately evokes her bayou home.
- Flowing Silhouettes: Her dresses tend to have a classic, often A-line or ballgown silhouette, with a well-fitted bodice and a full, graceful skirt.
- Lily Pad Motifs: One of the most recognizable elements is the lily pad design, often seen on the skirt layers, bodice, or as a peplum. These details bring the natural world of the bayou directly into the design.
- Floral Accents: A large, often white or yellow, flower is a key embellishment, typically worn at the waist or on the bodice.
- Layered Skirts: Many interpretations feature layered skirts, creating fullness and depth, reminiscent of a blooming flower or the ripples of water.
- Comfort & Wearability: While grand, Tiana's dresses also suggest a practicality suitable for a hardworking chef-turned-princess. This is where DIY excels, allowing you to prioritize ease of movement and soft fabrics.
When you're sifting through Princess Tiana dresses inspiration, keeping these elements in mind will help you choose patterns and fabrics that resonate with her specific aesthetic.
Unearthing the Best DIY Tiana Dress Tutorials & Patterns
The internet is a treasure trove of sewing resources, but finding the right pattern for a Tiana dress can feel overwhelming. You need something that's not only beautiful but also achievable, especially if you're a beginner.
The Made for Mermaids "Tiana Dress" Pattern: A Top Recommendation
For those looking to create a Tiana-inspired dress, especially for younger children, the "Tiana Dress" pattern from Made for Mermaids comes highly recommended. It offers a fantastic foundation for a comfortable, durable, and recognizable Tiana look.
- Key Features & Why They Matter:
- Sizes: Available for 6 months up to 8 years, making it ideal for toddlers and young children.
- Peasant Style: This is a game-changer for comfort and ease of wear. The elastic neck and sleeves mean a child can often pull the dress on and off themselves, fostering independence. It's also incredibly comfortable for everyday play, not just special occasions.
- Shaped Bodice & Sleeves: While it's a peasant style, the pattern still provides shaping for a great fit, avoiding the "boxy" look some simpler patterns can create.
- Center Panel: The front bodice includes a dedicated pattern piece for a center panel, which is perfect for adding contrasting fabric or embellishments to mimic Tiana's bodice details.
- Sash Ties: These are practical for achieving a tailored fit, especially for slender children, and offer room for growth.
- Shaped & Lined Over Skirt with Ruffled Underskirt: This combination delivers significant fullness without the need for a separate pettiskirt, adding to both comfort and the iconic layered look.
- Beginner-Friendly Instructions: Made for Mermaids provides a beautiful, computer-drafted, color-coded pattern with five main pieces. Crucially, it includes detailed, precise instructions with full-color photos, making it accessible even for novice sewers.
- Flower Tutorial: A bonus tutorial for a coordinating flower is included, allowing you to perfectly recreate Tiana's signature floral accent.
- Comprehensive Support: Expect yardage requirements, tips, tricks, and more. You'll need Adobe Reader to open the PDF files.
This pattern specifically addresses common frustrations with store-bought costumes – the itchiness, poor durability, and struggle to get them on and off. It offers a solution for a soft, comfortable, and wearable princess dress that can transition from a birthday party to a day at the park.
Exploring Other Pattern Options & Adaptations
While the Made for Mermaids pattern is a strong contender, your DIY journey might lead you to other paths:
- Free PDF Sewing Patterns: Websites like Tiana's Closet (though their example, the "Amanda tie shoulder top," isn't a dress, it illustrates the availability of free PDF patterns) and independent designers often offer free patterns. You might find a basic peasant dress or A-line dress pattern that you can then adapt with Tiana-specific details.
- Etsy & Independent Designers: A quick search on platforms like Etsy will reveal countless independent pattern designers offering both child and adult-sized Tiana-inspired dress patterns. Look for those with good reviews, clear instructions, and comprehensive material lists.
- Adapting General Dress Patterns: If you have a solid basic dress pattern you love, you can "Tiana-fy" it. This involves:
- Color Conversion: Choosing the right shades of green.
- Adding Layers: Modifying the skirt to include multiple layers or a ruffled underskirt.
- Embellishments: Designing and attaching lily pad appliques, floral elements, and possibly a peplum. This approach requires a bit more design confidence but offers maximum customization.
When selecting any pattern, always check the listed skill level, required yardage, and the clarity of the instructions. Reading reviews from other sewers can provide invaluable insight.
Essential Supplies: Gathering Your Bayou Builder's Toolkit
Before you dive into cutting and stitching, you'll need to gather your materials. Think of it like Tiana prepping her kitchen – the right ingredients make all the difference!
Fabric Choices: Comfort Meets Character
- Main Dress Fabric:
- For Children (Comfort is Key): Cotton blends, broadcloth, or even a soft knit fabric in shades of green (lime, emerald, sage) are excellent choices. They are breathable, washable, and comfortable for extended wear. Poplin or quilter's cotton also works well for structured elements.
- For Adults/Cosplay (Drape & Sheen): Consider satin, charmeuse, crepe, or even a good quality cotton sateen for a more elegant drape and a subtle sheen. Taffeta can add volume and a crisp look.
- Lining Fabric: For the bodice and any layered skirts, a lightweight cotton, broadcloth, or lining specific fabric (like satin lining) will add comfort, finish, and help the dress drape beautifully.
- Accent Fabrics: White, cream, or light yellow fabrics for the flower, lily pad appliques, or any contrasting panels. Felt can be great for sturdy lily pads that hold their shape.
- Sash Fabric: Often a matching or slightly contrasting green, or a gold/yellow. Satin or a sturdy cotton works well.
Notions & Embellishments: The Little Details That Sparkle
- Thread: Matching your main fabric colors. Always use good quality polyester thread for durability.
- Elastic: For necklines, sleeves, or waistbands, especially in peasant-style patterns.
- Interfacing: Light to medium-weight fusible interfacing for stabilizing bodices, waistbands, or collars, ensuring they hold their shape.
- Zippers/Buttons: If your chosen pattern requires them. Invisible zippers are often preferred for a seamless look.
- Flower Embellishments: Fabric for the flower (as per the Made for Mermaids tutorial), or pre-made fabric flowers.
- Applique Material: Green felt, cotton, or satin for cutting out lily pad shapes. Heat-n-Bond or a similar fusible web can make attaching appliques much easier.
- Fabric Paint/Markers: For adding detail to appliques or freehand designs, if desired.
Sewing Tools: Your Kitchen Utensils for Fabric
- Sewing Machine: A basic machine with a straight stitch and zigzag stitch is usually sufficient.
- Sharp Scissors: Dedicated fabric scissors are a must for clean cuts.
- Pins or Fabric Clips: For holding fabric layers together.
- Measuring Tape & Ruler: Essential for accurate measurements and cutting.
- Fabric Marker/Chalk: For transferring pattern markings.
- Iron & Ironing Board: Crucial for pressing seams, which makes a huge difference in the final look.
- Seam Ripper: Every sewer's best friend!
- Rotary Cutter & Mat (Optional but Recommended): Speeds up cutting and provides very straight edges.
Your Sewing Journey: From Pattern Pieces to Princess Dress
While every pattern is unique, the general flow of constructing a Tiana dress follows a logical path. Always refer to your specific pattern's instructions first and foremost!
- Print & Assemble the Pattern: For PDF patterns, print at 100% scale and carefully tape the pages together according to the diagram. Double-check your measurements against the size chart.
- Cut Your Fabric: Lay your pattern pieces on the fabric, aligning with the grainline. Pin securely and cut accurately. Remember to cut any lining pieces as well.
- Prepare Embellishments: If your pattern includes appliques (like lily pads) or a flower tutorial (like the Made for Mermaids one), now is a good time to prepare these components.
- Construct the Bodice: Sew the front and back bodice pieces together at the shoulder seams. If there's a center panel, attach it. Repeat for the lining. Attach sleeves, gather the neckline and/or sleeves with elastic as instructed.
- Assemble the Skirts: Stitch together the main skirt panels. If there are multiple layers or a ruffled underskirt, prepare and attach those according to your pattern. The Made for Mermaids pattern, for example, features a shaped and lined overskirt with a ruffled underskirt.
- Attach Bodice to Skirt: With right sides together, carefully pin and stitch the completed bodice to the skirt.
- Sew Side Seams: Stitch the side seams of the dress, ensuring any sleeves or bodice details align. If your dress has a zipper, you'll insert it at this stage.
- Hemming & Finishing: Hem the bottom edge of the skirt and any sleeve hems. Finish raw edges with a serger or zigzag stitch to prevent fraying.
- Add Sashes & Final Embellishments: Attach any sash ties, and then carefully place and secure your flower and lily pad appliques. Iron everything for a crisp, professional finish.
Remember, sewing is a journey, not a race. Take breaks, re-read instructions, and don't be afraid to use your seam ripper if something isn't quite right.
Adding the Royal Touches: Embellishments That Bring Tiana to Life
What truly makes a DIY Tiana dress sing are the thoughtful embellishments that capture her unique style.
- The Signature Flower: Whether you follow the specific flower tutorial included with the Made for Mermaids pattern or create your own, a prominent, often white or yellow, blossom at the waist or on the bodice is essential. You can add subtle glitter or pearl beads to its center for extra sparkle.
- Lily Pad Power: These are Tiana's unmistakable motif.
- Appliques: Cut lily pad shapes from green felt or fabric, and either machine applique them (using a zigzag stitch) or hand-stitch them onto the skirt layers. Using a fusible web first can make placement easy.
- Fabric Paint: For a more whimsical touch, you could use fabric paint to stencil or freehand lily pad outlines or patterns onto the skirt.
- Layered Effects: Consider cutting lily pads from different shades of green fabric and layering them for a more dimensional look.
- Subtle Sparkle: A touch of iridescent glitter fabric paint on the lily pads or a sprinkle of sew-on crystals can add a magical shimmer without being over-the-top.
- Beyond the Dress: Think about accessories! A simple green headband adorned with a matching flower, or even green gloves, can complete the ensemble.
Navigating Common DIY Dressmaking Hurdles
Even seasoned sewers encounter challenges. Here are a few common pitfalls and how to overcome them:
- Pattern Sizing Confusion: Always measure the wearer and compare to the pattern's finished garment measurements, not just age/size labels. If between sizes, often sizing up and taking in is easier than trying to add fabric.
- Fabric Slippage: Silky fabrics can be tricky. Use plenty of fine, sharp pins or fabric clips. Consider using a walking foot on your sewing machine to help feed layers evenly.
- Puckered Seams: This often happens with delicate fabrics or incorrect tension. Practice on scraps, adjust your machine's tension, and make sure you're using the correct needle for your fabric type. Pressing seams as you go is also critical.
- Confusing Instructions: If a step isn't clear, don't just guess. Look for video tutorials online (often there are videos for popular patterns or general sewing techniques), consult a sewing friend, or reach out to the pattern designer for clarification. Online sewing communities are fantastic resources.
- Fabric Grainline Issues: Cutting off-grain can lead to a dress that hangs awkwardly or twists. Always ensure your pattern pieces are aligned with the fabric's grainline as indicated.
Caring for Your Handmade Masterpiece
Your DIY Tiana dress is a labor of love, so treat it with care to ensure it lasts for countless adventures.
- Washing: Always check your fabric care instructions before washing. For most cottons, a gentle machine wash in cold water with a mild detergent is fine. If you've used delicate embellishments (like hand-sewn beads or delicate appliques), hand-washing or spot-cleaning might be best. Always air dry or tumble dry on low to prevent shrinkage or damage to embellishments.
- Ironing: Use a medium heat iron, and always iron the dress inside out to protect any embellishments or the fabric's finish. A pressing cloth can also be very helpful.
- Storage: Store the dress on a padded hanger in a breathable garment bag to protect it from dust and snags. If it's a very full dress, avoid crushing it with other garments.
Share Your Magic: Connecting with the Sewing Community
One of the most rewarding aspects of DIY is sharing your creations. Post photos of your finished Tiana dress on social media, in sewing groups, or on pattern designer forums. Not only does it allow you to show off your hard work, but it also inspires others and opens doors to helpful feedback and new connections within the vibrant sewing community. You might even inspire another aspiring seamstress to explore DIY Tiana Dress Tutorials & Patterns themselves!
Embrace the process, enjoy the learning, and delight in the unique, comfortable, and enchanting Tiana dress you create. Your imagination, needle, and thread are all you need to bring a little bayou magic to life.